


Set up CrowdSec to protect your WordPress site

Let’s find out how you can protect your Docker WordPress site using CrowdSec. You can now protect your WordPress site like a pro in a few simple steps! This guide assumes that you are running a WordPress Docker container that exists behind a reverse proxy. You need to skip one step if you are not using a reverse proxy.
Table of Contents
About CrowdSec
CrowdSec is an open-source, collaborative IP security solution that analyses behaviors and shares signals across the community. It’s like Fail2Ban, but you can share your ban with other users. Sharing bans helps you preemptively block malicious hosts before they cause any damage.
About Reverse Proxy
A reverse proxy is a server that sits in front of one or more web servers, intercepting client requests. The reverse proxy then forwards the request from the front to the back and specifies the original IP in the X-Forwarded-For (or XFF) header. The XFF request header is a de-facto standard header for identifying the originating IP address of a client connecting to a web server through a proxy server. Thankfully, CrowdSec has a built-in feature that allows you to use a reverse proxy and check the XFF headers without issue.
What You Will Need
This guide assumes that you have some working knowledge of reverse proxy and Docker. Thus, you should already have a working Docker setup, reverse proxy, and running WordPress site.
Let’s get started!
Setup the CrowdSec Agent for your Docker WordPress
First, we need to set up the local API and Agent. Both co-exist in the official container:
version: "2.1"
services:
  crowdsec:
    image: docker.io/crowdsecurity/crowdsec:latest
    container_name: crowdsec
    ports:
      - 49155:8080
    environment:
      - GID=1000
      - COLLECTIONS=crowdsecurity/wordpress crowdsecurity/http-cve crowdsecurity/whitelist-good-actors
    volumes:
      - /mnt/containers/crowdsec/config:/etc/crowdsec:rw
      - /mnt/containers/crowdsec/data:/var/lib/crowdsec/data:rw
      - /var/log:/var/log/host:ro
    restart: unless-stopped
So, what have we just done?
- First, you created a container called “crowdsec”.
- Next, you exposed port “49155” to this container. Change this if this port is not available to you.
- And finally, you persisted the CrowdSec storage to “/mnt/containers/crowdsec/”.
Note, however, that CrowdSec will read the logs of the WordPress Docker container from “/var/log”. Therefore, you need to adjust your WordPress Docker container to log this folder into the Syslog.
Here is an example of how to set the logging driver to achieve this:
services:
  blog:
    container_name: "my-blog"
    image: "wordpress:latest"
    ports:
      - 49154:80
    restart: "always"
    volumes:
      - /mnt/containers/my-blog:/var/www/html
    logging:
      driver: "syslog"
Next, to make life easier working with CrowdSec CLI inside the container, we’re going to create an alias in our shell profile:
alias cscli="docker exec -t crowdsec cscli"Finally, you should get the IP address of the container because we will use it later:
docker inspect -f '{{range.NetworkSettings.Networks}}{{.IPAddress}}{{end}}' crowdsecInstall the CrowdSec WordPress Plugin
Now that you have the CrowdSec agent and API Docker container running, you need to install the CrowdSec WordPress Bouncer.
You can install it just like any other WordPress plugin:
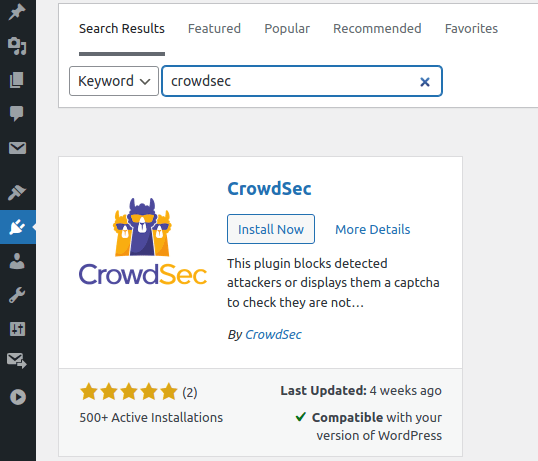
- Find the CrowdSec plugin in the WordPress marketplace
- Then install and activate the plugin.
Configure the CrowdSec WordPress Plugin
Now you can navigate to the CrowdSec plugin in WordPress and configure your CrowdSec Bouncer.
To do this, you will need to know the IP address of the CrowdSec container. See the previous commands to see how to do this. Next, you will need an API key to allow the Bouncer to connect to the Agent.
You can get an API key by running the following command:
cscli bouncers add my-wp-bouncerFor example, this command will output something like this:
Api key for 'my-wp-bouncer':

   fccdbc6012314a4edd58da033cc46dbf1

Please keep this key since you will not be able to retrieve it!
Next, add the API URL using the known IP address and the API key to the WordPress Bouncer plugin:
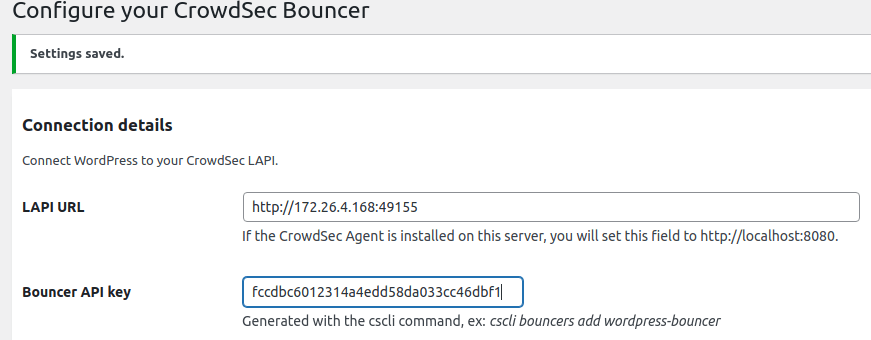
Next, we need to configure our reverse proxy. You will need to know the IP address of your reverse proxy for this step. Click on the CrowdSec Advanced Settings option and enter your trusted IPs in the “Trust these CDN IPs (or Load Balancer, HTTP Proxy)” setting.

Test your CrowdSec WordPress Blocker
You can now test if everything is working as expected. First, use another device such as your phone, and make sure you connect to the internet with a different IP address. Then try to connect to your WordPress site. Again, everything should work as expected.
Next, get the IP address of your different device with another IP and run the following command:
cscli decisions add -i 49.179.65.10You should see a result like this:
INFO[07-05-2022 08:19:01 AM] Decision successfully added Visiting the same site should initiate a display of a message like this:
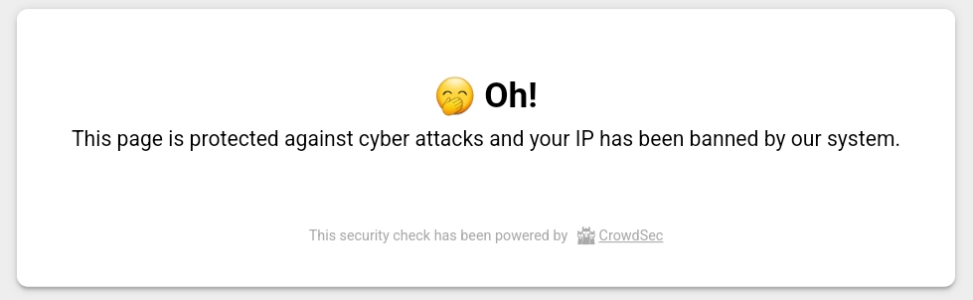
This message means that your WordPress Docker container is using CrowdSec correctly. Well done!
You can undo the IP ban using the following command:
cscli decisions delete -i 49.179.65.10Useful CrowdSec commands
List Bouncers
To see a list of all the connected bouncers:
cscli bouncers listExample output:

List Alerts
To see a list of all the alerts:
cscli alerts listExample output:

Inspect An Alert
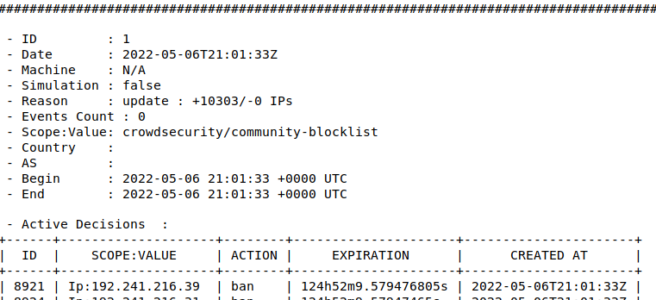
To inspect a specific alert:
cscli alerts inspect <alert id>Example output:
Wrapping Up
You have learned how to set up CrowdSec to protect your WordPress site behind a reverse proxy on Docker. CrowdSec makes it easy to help keep your WordPress site secure.