


Jitsi-Meet Videokonferenzen werden zunehmend wichtiger im beruflichen aber auch im privaten Alltag. Der Bedarf an stabilen und sicheren Videokonferenzsystemen wächst täglich. Häufig wird zu proprietäre Lösungen wie z.B. Teams, Skype, WhatsApp, FaceTime und anderen Tools gegriffen, ohne dabei die Aspekte des Datenschutzes und der Privatsphäre bewertet zu haben. Eine meines Erachtens nach bessere Alternative stellt bspw. neben BigBlueButton die Anwendung Jitsi Meet dar – eine quelloffene Software, mit der auch mehrere Teilnehmer gleichzeitg an Telefon- und Videokonferenzen teilnehmen können. Und das – nach Abarbeitung dieses Guides – auch ohne Drittanbieter wie Google & Co!
Voraussetzungen (wir beziehen uns in diesem Artikel auf Ubuntu 22.04):
– Debian 10 (Buster) oder Debian 11
– Ubuntu 20.04 (Focal Fossa) Ubuntu 22.04 LTS (empfohlen!)
Inhalt:
- Installation von Jitsi Meet
- Verwendung eines eigenen stun/coturn-Servers
- Allgemeine Anpassungen und Optimierungen
- Design-Anpassungen
- Logging deaktivieren
Beginnen wir mit den Vorbereitungen und der Installation. Aktualisieren Sie zuerst das System und installieren dann die Basispakete von Jitsi Meet.
1. Installation
sudo -s
apt update && apt upgrade
apt-add-repository universe
apt update && sudo apt install apt-transport-https net-tools inetutils-ping
Prüfen Sie Ihren A-Record (DNS-Eintrag für Jitsi Meet, bspw. jitsi.ihredomain.de) und tragen diesen sowohl per Befehl in die Datei /etc/hostname,
hostnamectl set-hostname jitsi.ihredomain.deals auch manuell in die Datei /etc/hosts ein (x.x.x.x muss durch Ihre externe IP ersetzt werden)
nano /etc/hosts[...]
127.0.0.1 localhost
127.0.1.1 jitsi.ihredomain.de
x.x.x.x jitsi.ihredomain.de
[...]Sie können die Funktionalität bspw. per Ping überprüfen.
ping "$(hostname)"
Als Rückgabewert sollten Sie Ihre Domain (jitsi.ihredomain.de) sehen.
Die Grundvoraussetzungen sind nun geschaffen und wir beginnen mit der Installation und Einrichtung von Jitsi Meet inkl. aller benötigten Komponenten.
curl https://download.jitsi.org/jitsi-key.gpg.key | sudo sh -c 'gpg --dearmor > /usr/share/keyrings/jitsi-keyring.gpg'echo 'deb [signed-by=/usr/share/keyrings/jitsi-keyring.gpg] https://download.jitsi.org stable/' | sudo tee /etc/apt/sources.list.d/jitsi-stable.list > /dev/nullapt updateKonfigurieren Sie die Firewall. Wir gehen davon aus, dass Sie einen dedizierten stun/coturn-Server verwenden, daher werden die Ports 3478/udp und 5439/tcp nicht konfiguriert.
apt install -y ufwufw allow 80/tcp
ufw allow 443/tcp
ufw allow 10000/udp
ufw allow 22/tcp
ufw enableÜberprüfen Sie im Anschluss nun die Firewall.
ufw status verboseSind diese Schritte abgeschlossen beginnen Sie mit der eigentlichen Installation:
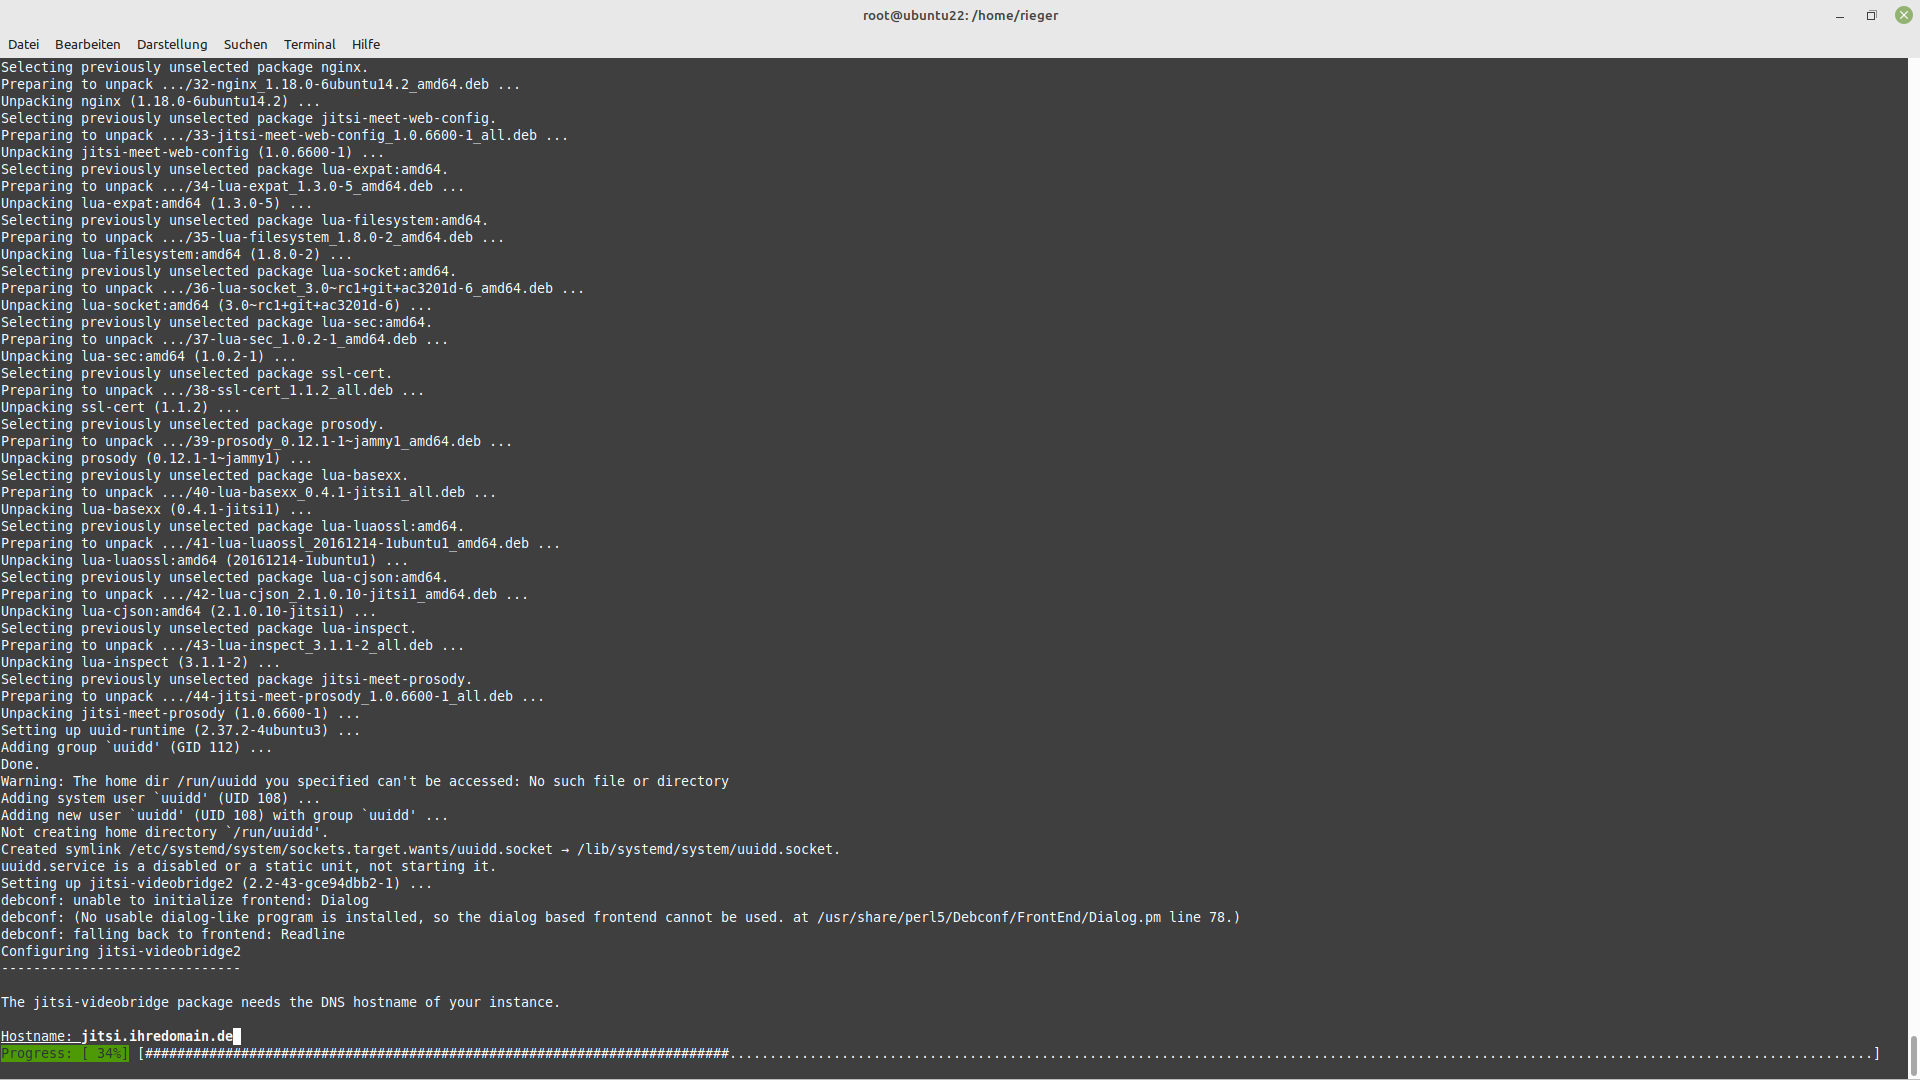
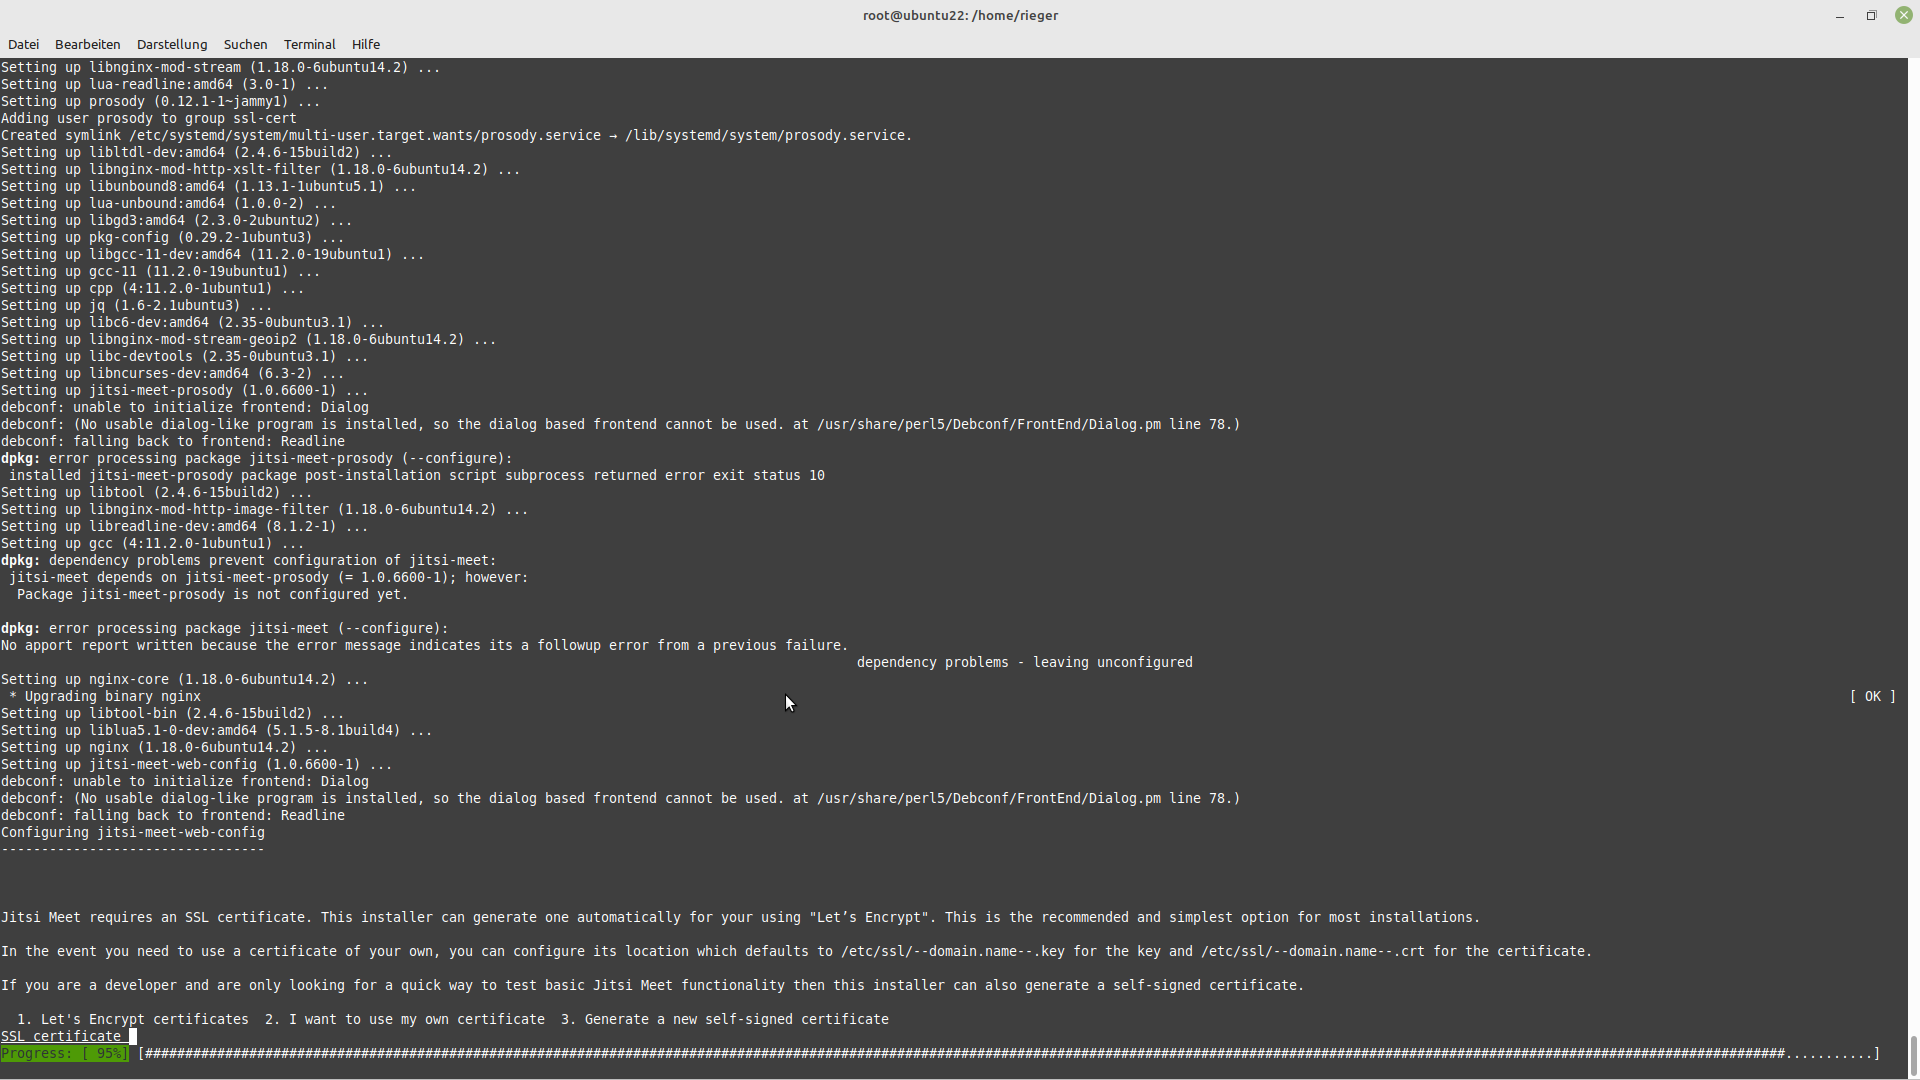
apt install -y jitsi-meet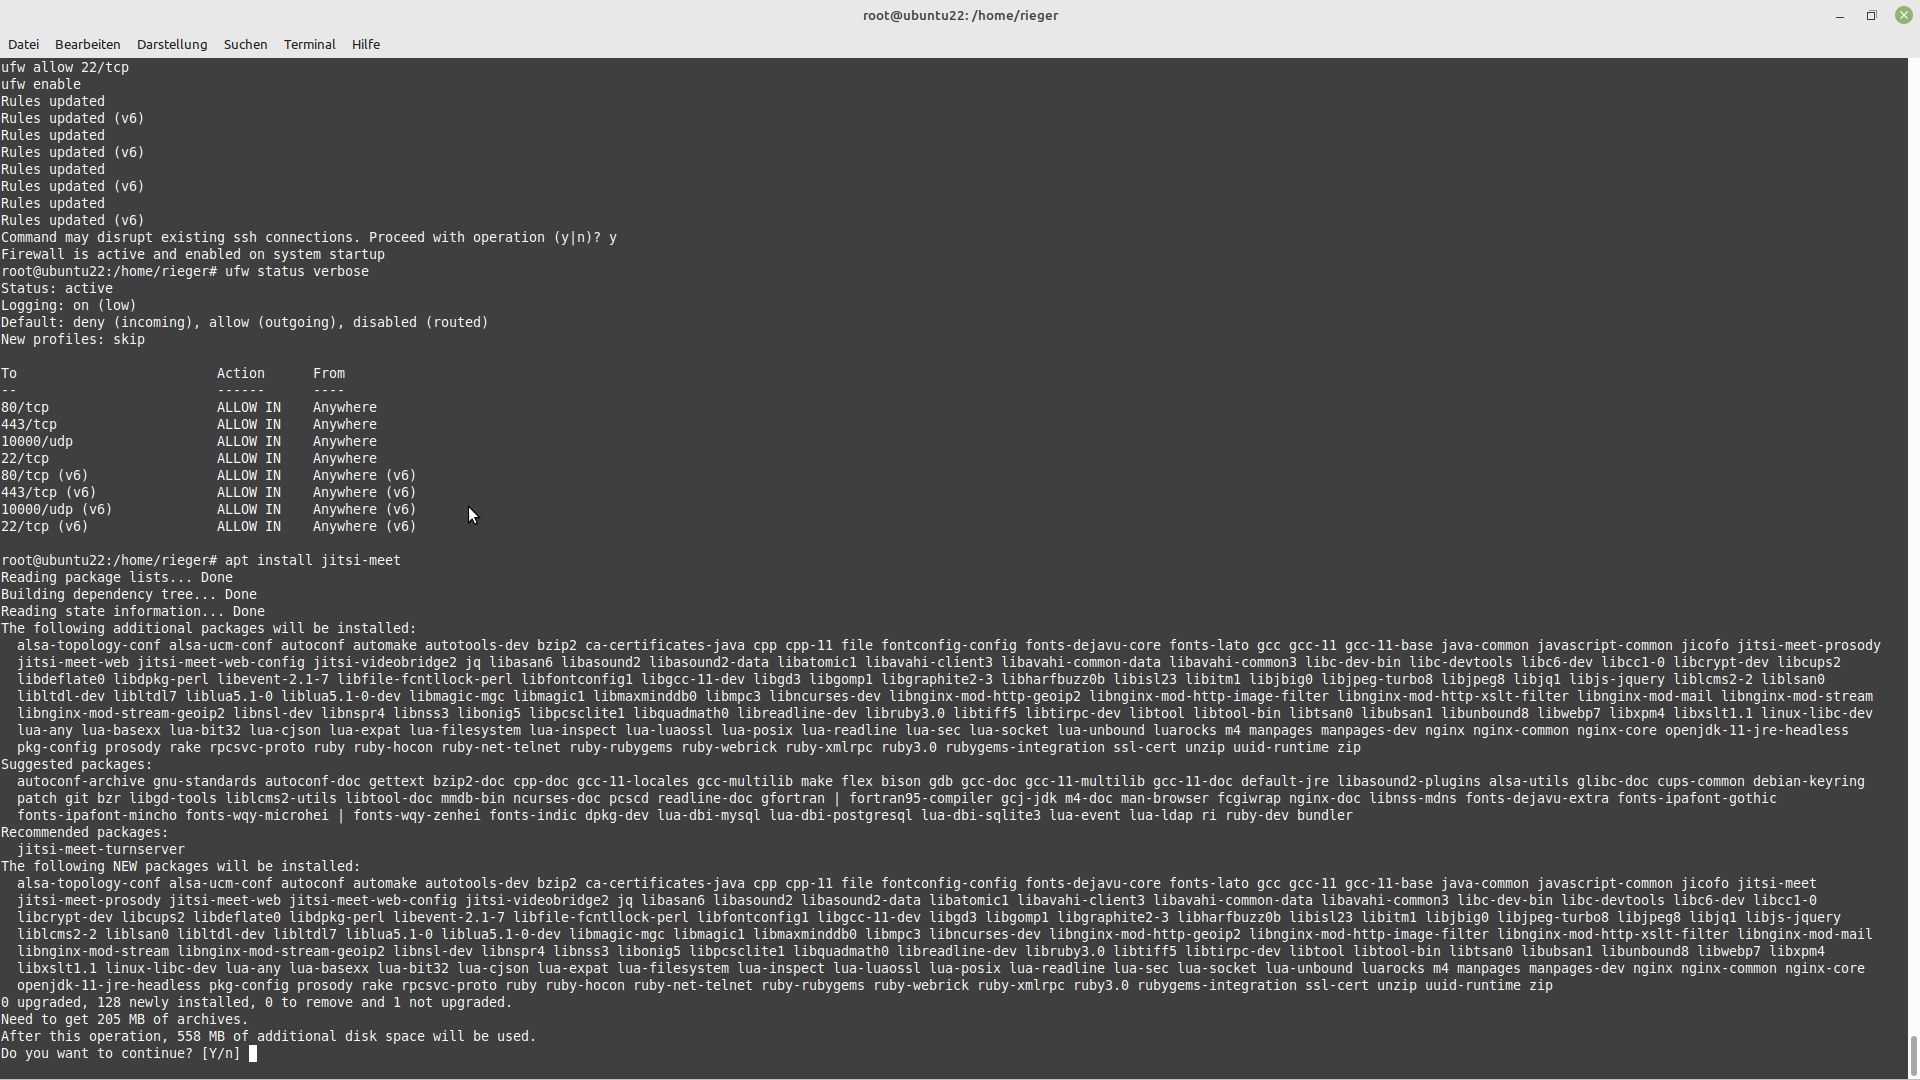
Sie werden im Verlauf nach dem Hostname gefragt:
und wie sie mit den SSL/TLS-Zertifikaten verfahren möchten.
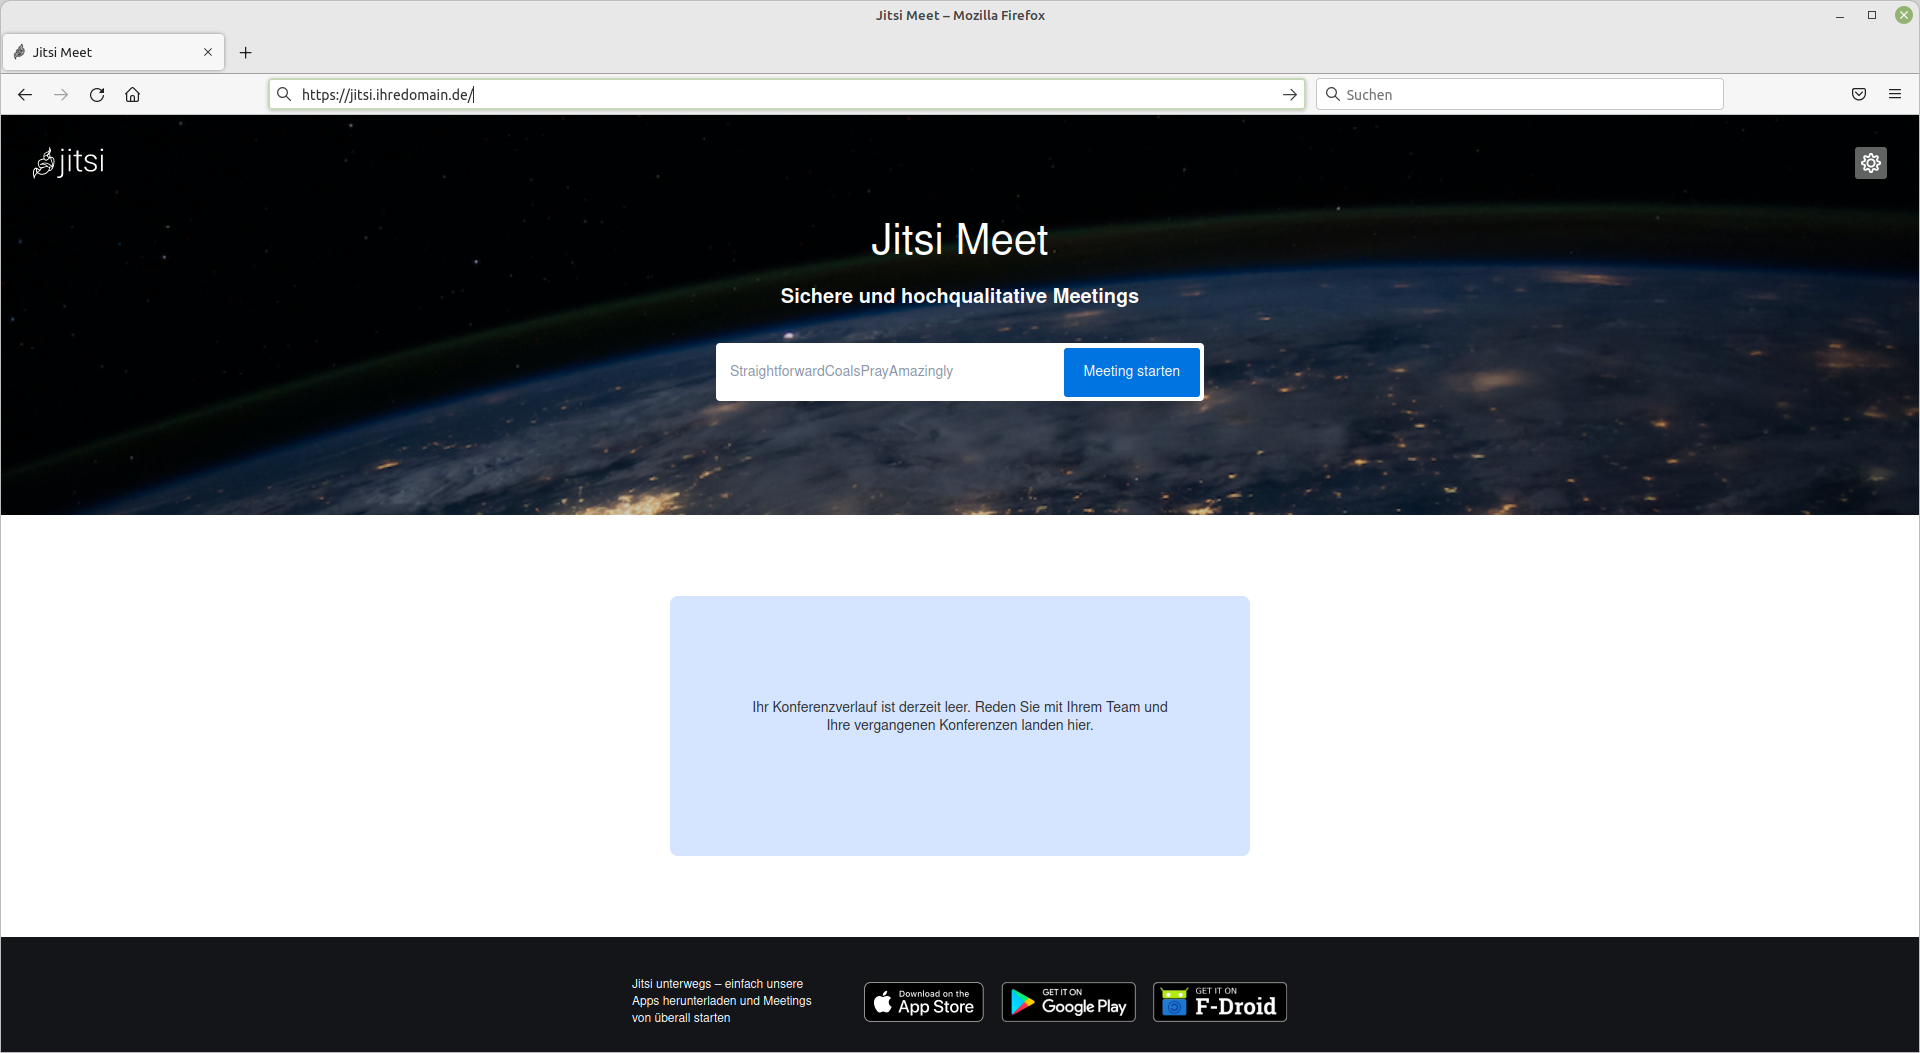
Wenige Momente später ist Ihre Jitsi Meet-Instanz bereits erreichbar. Rufen Sie dafür im Browser ihre Domain (https://ihre.domain.de) auf
Optimieren Sie das System, indem Sie diese drei Zeilen ergänzen:
nano /etc/systemd/system.conf [...]
DefaultLimitNOFILE=65000
DefaultLimitNPROC=65000
DefaultTasksMax=65000Aktivieren und prüfen Sie diese Werte:
systemctl daemon-reloadsystemctl show --property DefaultLimitNPROC
systemctl show --property DefaultLimitNOFILE
systemctl show --property DefaultTasksMaxStarten Sie die Jitsi Videobridge2 neu:
systemctl restart jitsi-videobridge2Mittels des Befehls systemctl status fragen Sie den Status des Dienstes ab:
systemctl status jitsi-videobridge2Somit kann der Wert
Tasks: XX (limit: 65000)
überprüft werden. Die Änderungen hinsichtlich der Dateien und Prozesse können wie folgt überprüft werden:
cat /proc/`cat /var/run/jitsi-videobridge/jitsi-videobridge.pid`/limits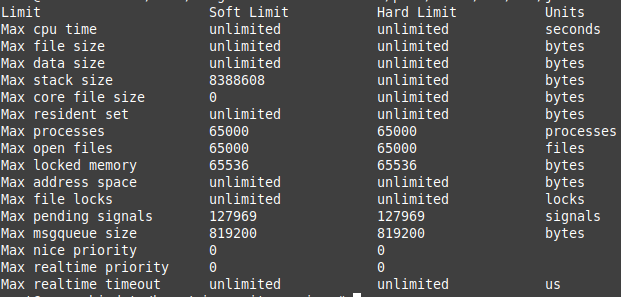
Dort finden Sie die zuvor eingegebenen Werte (65.000). Um Debugging zu betreiben möchten wir diese Logdateien nennen:
Video Bridge Logs:
tail -f /var/log/jitsi/jvb.log

Jicofo Logs:
tail -f /var/log/jitsi/jicofo.log

Prosody Logs:
tail -f /var/log/prosody/prosody.log

Nginx Logs:
tail -f /var/log/nginx/error.log
Die Installation ist nun abgeschlossen. Die Anpassungen hinsichtlich der Datenschutzkonformität, Performance- und Designanpassungen folgen im weiteren Verlauf dieses Artikels.
2. Verwenden eines eigenen stun/coturn-Servers
Die Installation eines stun/coturn-Servers beschreiben wir hier. Um den eigenen coturn-Server zu verwenden passen Sie die Dateien /etc/jitsi/meet/jitsi.ihredomain.de-config.js und /etc/prosody/conf.d/jitsi.ihredomain.de.cfg.lua an:
Deaktivieren Sie P2P und stellen den stun/coturn-Server um:
nano /etc/jitsi/meet/jitsi.ihredomain.de-config.js an[...]
p2p: {
enabled: false,
...
preferredCodec: 'VP9,VP8',
...
disableH264: true,
...
stunServers: [
// { urls: 'stun:jitsi:3478' },
{ urls: 'stun:coturn.ihredomain.de:443' },
],
},
[...]Setzen Sie dann den ‚globalen‘ stun/coturn-Server:
nano /etc/prosody/conf.d/jitsi.ihredomain.de.cfg.lua[...]
external_service_secret = "IhrGeheimerSchlüssel";
external_services = {
{ type = "stun", host = "coturn.ihredomain.de", port = 443 },
{ type = "turn", host = "coturn.ihredomain.de", port = 443, transport = "udp", secret = true, ttl = 86400, algorithm = "turn" },
{ type = "turns", host = "coturn.ihredomain.de", port = 443, transport = "tcp", secret = true, ttl = 86400, algorithm = "turn" }
};
[...](3) Allgemeine Anpassungen und Optimierungen
Passen Sie die Datei an, um folgende Parameter zu setzen:
nano /etc/jitsi/meet/jitsi.ihredomain.de-config.js an// Specifies whether there will be a search field in speaker stats or not
disableSpeakerStatsSearch: false,// w3c spec-compliant video constraints to use for video capture. Currently
// used by browsers that return true from lib-jitsi-meet’s
// util#browser#usesNewGumFlow. The constraints are independent from
// this config’s resolution value. Defaults to requesting an ideal
// resolution of 720p.
constraints: {
     video: {
         height: {
             ideal: 720,
             max: 720,
             min: 240,
         },
     },
 },
// Enable / disable simulcast support.
disableSimulcast: true,// Recording
recordingService: {
//     // When integrations like dropbox are enabled only that will be shown,
//     // by enabling fileRecordingsServiceEnabled, we show both the integrations
//     // and the generic recording service (its configuration and storage type
//     // depends on jibri configuration)
     enabled: false,

//     // Whether to show the possibility to share file recording with other people
//     // (e.g. meeting participants), based on the actual implementation
//     // on the backend.
     sharingEnabled: false,

//     // Hide the warning that says we only store the recording for 24 hours.
     hideStorageWarning: true,
 },
// Local recording configuration.
     localRecording: {
    //     // Whether to disable local recording or not.
         disable: true,

    //     // Whether to notify all participants when a participant is recording locally.
         notifyAllParticipants: false,

    //     // Whether to disable the self recording feature (only local participant streams).
         disableSelfRecording: true,
     },
// Default value for the channel „last N“ attribute. -1 for unlimited.
channelLastN: 4,// Specify the settings for video quality optimizations on the client.
videoQuality: {
    //    // Provides a way to prevent a video codec from being negotiated on the JVB connection. The codec specified
    //    // here will be removed from the list of codecs present in the SDP answer generated by the client. If the
    //    // same codec is specified for both the disabled and preferred option, the disable settings will prevail.
    //    // Note that 'VP8' cannot be disabled since it's a mandatory codec, the setting will be ignored in this case.
        disabledCodec: 'H264',
    //
    //    // Provides a way to set a preferred video codec for the JVB connection. If 'H264' is specified here,
    //    // simulcast will be automatically disabled since JVB doesn't support H264 simulcast yet. This will only
    //    // rearrange the the preference order of the codecs in the SDP answer generated by the browser only if the
    //    // preferred codec specified here is present. Please ensure that the JVB offers the specified codec for this
    //    // to take effect.
        preferredCodec: 'VP9, VP8',
    //
    //    // Provides a way to enforce the preferred codec for the conference even when the conference has endpoints
    //    // that do not support the preferred codec. For example, older versions of Safari do not support VP9 yet.
    //    // This will result in Safari not being able to decode video from endpoints sending VP9 video.
    //    // When set to false, the conference falls back to VP8 whenever there is an endpoint that doesn't support the
    //    // preferred codec and goes back to the preferred codec when that endpoint leaves.
    //    enforcePreferredCodec: false,
    //
    //    // Provides a way to configure the maximum bitrates that will be enforced on the simulcast streams for
    //    // video tracks. The keys in the object represent the type of the stream (LD, SD or HD) and the values
    //    // are the max.bitrates to be set on that particular type of stream. The actual send may vary based on
    //    // the available bandwidth calculated by the browser, but it will be capped by the values specified here.
    //    // This is currently not implemented on app based clients on mobile.
    //    maxBitratesVideo: {
    //          H264: {
    //              low: 200000,
    //              standard: 500000,
    //              high: 1500000,
    //          },
    //          VP8 : {
    //              low: 200000,
    //              standard: 500000,
    //              high: 1500000,
    //          },
    //          VP9: {
    //              low: 100000,
    //              standard: 300000,
    //              high: 1200000,
    //          },
        },
// Require users to always specify a display name.
requireDisplayName: true,// Whether to use a welcome page or not. In case it’s false a random room
// will be joined when no room is specified.
enableWelcomePage: true,// Enabling the close page will ignore the welcome page redirection when
// a call is hangup.
enableClosePage: true,// Default language for the user interface. Cannot be overwritten.
defaultLanguage: 'de',// Hides the email section under profile settings.
hideEmailInSettings: true,// Configs for prejoin page.
prejoinConfig: {
    //     // When 'true', it shows an intermediate page before joining, where the user can configure their devices.
    //     // This replaces `prejoinPageEnabled`.
         enabled: true,
    //     // Hides the participant name editing field in the prejoin screen.
    //     // If requireDisplayName is also set as true, a name should still be provided through
    //     // either the jwt or the userInfo from the iframe api init object in order for this to have an effect.
         hideDisplayName: false,
    //     // List of buttons to hide from the extra join options dropdown.
    //     hideExtraJoinButtons: ['no-audio', 'by-phone'],
     },
// Setup for Gravatar-compatible services.
gravatar: {
    //     // Defaults to Gravatar.
    //     baseUrl: 'https://www.gravatar.com/avatar/',
    //     // True if Gravatar should be disabled.
         disabled: true,
     },
// Moved from interfaceConfig(TOOLBAR_BUTTONS).
// The name of the toolbar buttons to display in the toolbar, including the
// „More actions“ menu. If present, the button will display. Exceptions are
// „livestreaming“ and „recording“ which also require being a moderator and
// some other values in config.js to be enabled. Also, the „profile“ button will
// not display for users with a JWT. // Notes:
// – it’s impossible to choose which buttons go in the „More actions“ menu
// – it’s impossible to control the placement of buttons
// – ‚desktop‘ controls the „Share your screen“ button
// – if toolbarButtons is undefined, we fallback to enabling all buttons on the UI
toolbarButtons: [
        'camera',
        'chat',
        'closedcaptions',
        'desktop',
    //    'dock-iframe',
    //    'download',
    //    'embedmeeting',
        'etherpad',
        'feedback',
        'filmstrip',
        'fullscreen',
        'hangup',
    //    'help',
        'highlight',
    //    'invite',
    //    'linktosalesforce',
        'livestreaming',
        'microphone',
        'noisesuppression',
        'participants-pane',
        'profile',
        'raisehand',
    //    'recording',
        'security',
        'select-background',
        'settings',
    //    'shareaudio',
    //    'sharedvideo',
        'shortcuts',
    //    'stats',
        'tileview',
        'toggle-camera',
    //    'undock-iframe',
        'videoquality',
     ],
// Whether to enable stats collection or not in the TraceablePeerConnection.
// This can be useful for debugging purposes (post-processing/analysis of
// the webrtc stats) as it is done in the jitsi-meet-torture bandwidth
// estimation tests.
gatherStats: false,// // Enable rtc stats for face landmarks
enableRTCStats: false,// Start calls with audio muted. Unlike the option above, this one is only
// applied locally. FIXME: having these 2 options is confusing.
startWithAudioMuted: true,// Start calls with video muted. Unlike the option above, this one is only
// applied locally. FIXME: having these 2 options is confusing.
startWithVideoMuted: true, // Privacy
disableThirdPartyRequests: true,// Hides the participants stats
hideParticipantsStats: true,// True if the analytics should be disabled
analytics: {
// True if the analytics should be disabled
disabled: true,
// Disables storing the room name to the recents list. When in an iframe this is ignored and
// the room is never stored in the recents list.
doNotStoreRoom: true,// List of undocumented settings used in jitsi-meet
requireDisplayName: true,// Application logo url
defaultLogoUrl: 'images/IhrLogo.png',Speichern und verlassen Sie diese Datei, um die Recorder-URL in der Datei
nano /etc/jitsi/jicofo/jicofo.confzu deaktivieren. Dazu fügen Sie zu Beginn der Zeile ein ‚#‚-Zeichen hinzu.
[...]
# trusted-domains: [ "recorder.ihre.jitsidomain.de" ]
[...]
4. Design-Anpassungen
Um die Startseite zu bearbeiten müssen mindestens zwei Dateien, die /usr/share/jitsi-meet/interface_config.js und die /usr/share/jitsi-meet/static/welcomePageAdditionalContent.html, editiert werden.
nano /usr/share/jitsi-meet/interface_config.js
[...]
var interfaceConfig = {
    APP_NAME: 'Ihr Slogan',
...
DEFAULT_WELCOME_PAGE_LOGO_URL: 'images/IhrLogo.png',

...
DISABLE_DOMINANT_SPEAKER_INDICATOR: true,
...
DISABLE_JOIN_LEAVE_NOTIFICATIONS: true,
...

DISABLE_VIDEO_BACKGROUND: false,

DISPLAY_WELCOME_FOOTER: false,
DISPLAY_WELCOME_PAGE_ADDITIONAL_CARD: false,
DISPLAY_WELCOME_PAGE_CONTENT: true,
DISPLAY_WELCOME_PAGE_TOOLBAR_ADDITIONAL_CONTENT: false,
...
GENERATE_ROOMNAMES_ON_WELCOME_PAGE: false,
...
JITSI_WATERMARK_LINK: 'https://www.ihredomain.de/',
...
MOBILE_APP_PROMO: true,
...
RECENT_LIST_ENABLED: false,
...
SETTINGS_SECTIONS: [ 'devices', 'moderator', 'profile', 'calendar', 'sounds', 'more' ],
...
DEFAULT_LOGO_URL: 'images/IhrLogo.png',
nano /usr/share/jitsi-meet/static/welcomePageAdditionalContent.html<template id = "welcome-page-additional-content-template">
<div id="box">
<br /><br />
Ihr Slogan
</div>
<div id="custom-footer">
<a style="color: #323232" href="https://www.domain.de/" title="Anleitung und Nutzungsbedingungen von xyz" target="_blank">Anleitung/Nutzungsbedingungen</a> · <a style="color: black" href="https://www.domain.de/impressum/" title="Impressum" target="_blank">Impressum</a> · <a style="color: black" href="https://www.domain.de/datenschutz.php/" title="Datenschutz" target="_blank">Datenschutz</a>
<br>DSGVO-konforme Jitsi Meet Instanz der <a href="https://www.domain.de/" title="Name Des Linkziels" target="_blank" style="color: #0074e0">Stadt Ravensburg</a>
</div>
</template>
<style type="text/css">
.welcome .header .header-text-title { visibility:hidden !important; }
.welcome .header .header-text-subtitle { visibility:hidden !important; }
#box{
overflow-x: hidden;
height: 300px;
width: 900px;
margin-top: -100px;
margin-left: -450px;
position: absolute;
top: 120px;
left: 50%;
border: none;
text-align: center;
color: white;
font-size:3.5em;
}
.welcome .header {
overflow-x: hidden;
background-image: url(/static/welcome-background.png);
position: absolute;
bottom: 0;
top: 0;
left: 0;
right: 0;
background-color: #cccccc;
height: 67%;
}
#custom-footer {
overflow-x: hidden;
margin-left: -300px;
position: absolute;
bottom: 5%;
left: 50%;
width: 600px;
height: 50px;
text-align: center;
background-color: white;
color: black;
font-size:1.0em;
}
</style>5. Logging deaktivieren
Zuerst deaktivieren wir das Webserver-Loggingverhalten:
nano /etc/nginx/nginx.confaccess_log off;
error_log off;Danach reduzieren wir das Loggingverhalten von Jitsi Meet:
nano /etc/jitsi/videobridge/logging.properties.level=WARNINGNach Abschluss dieser Anpassungen werden die Dienste neu gestartet
systemctl restart nginx prosody jicofo jitsi-videobridge2und Ihr Jitsi Meet-Server steht datenschutzkonform für Ihre Anwender zur Verfügung. Für weitergehende Anpassungen stehen wir Ihnen gerne zur Verfügung, zudem lohnt sich der Blick auf die Herstellerseite.